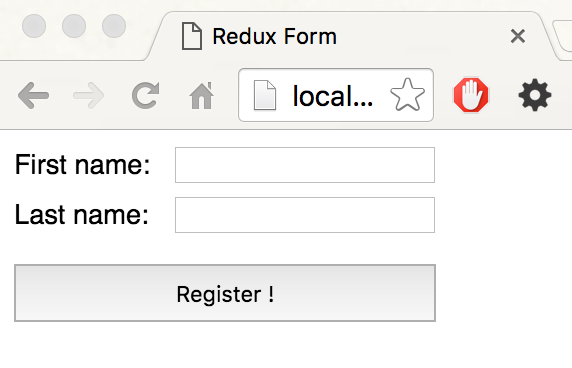
rWiting forms in React and Redux can be challenging, having to deal with forms and fields. In this article we are going to build couple of form using an exisiting library sepcifically for Redux called react-redux-form.
Let’s start off by downloading necessary packages.
Installation
We need Node.js installed to begin with. Follow the link, download Node.js for installation instructions.
Now create a folder for your project and then run the following command in command line.
npm init
Open up the console and install following packages:
React & Redux
npm install react react-dom redux ––save
React Redux Form
Also we need to install react-redux-form:
npm install react-redux-redux ––save
Redux Thunk
The redux-thunk middleware is useful for determining the proper action to dispatch based on the state, as well as dispatching actions or sequences of actions asynchronously.
npm install redux-thunk ––save
Babel
We need Babel to write our shiny ES6 code.
npm install babel-cli ––save
npm install babel-preset-react babel-preset-es2015 ––save
Webpack
We are going to use Webpack to build our project.
npm install webpack webpack-dev-server babel-loader ––save–dev
Setting Up
Create .babelrc
In order to create a preset to use Babel, we have to create a .babelrc file.
{
  "presets" : ["es2015"]
}
Create React Components
Create a folder called components and create a file called FormField.js.
import React from 'react';
import { Field } from 'react-redux-form';
import '../styles/form.css';

const FormField = ({ model, label, type }) => {
  return (
    <Field model={model} className="field">
      <label>{label}</label>
      <input type={type} />
    </Field>
  );
};

export default FormField;
Create Styles
Create a folder called styles under the src directory to hold our styles.
label {
    width: 5rem;
    display: inline-block;
}

button {
    padding: .5rem 1rem;
    width: 13.2rem;
    margin-top: .5rem;
}

form {
    font-family: Helvetica, Arial;
    font-size: .85rem;
}

.field {
    margin: .4rem 0;
}
Create containers
Containers are higher order components that Redux will be connecting to. They hold the components which usually don’t need to know about the store.
Create a file called LoginForm.js under the containers folder.
import React from 'react';
import { connect } from 'react-redux';
import { Field, Form, actions } from 'react-redux-form';
import FormField from '../components/FormField';

const LoginForm = ({ user }) => {
  return (
    <form>
       <FormField model="user.username" label="Username" type="text" />
       <FormField model="user.password" label="Password" type="password"/>

       <button>Log in</button>
     </form>
  );
};

const selector = (state) => ({ user: state.user });

export default connect(selector)(LoginForm);
Create Store
The store will contain the reducers handling logic and connecting to the external end points etc.
We import react-redux-form redux-thunk for handling side-effects (asynchronous calls to external APIs etc.)
Create Root
The top level component that renders to the DOM will be our root file. Let’s call it index.js.
import React from 'react';
import ReactDOM from 'react-dom';
import UserForm from './containers/UserForm';
import { createStore, combineReducers } from 'redux';
import { Provider } from 'react-redux';
import { modelReducer, formReducer } from 'react-redux-form';
import store from './store.js';

const reducer = combineReducers({
  user: modelReducer('user'),
  userForm: formReducer('user')
});

ReactDOM.render(
  <Provider store={store}>
    <UserForm />
  </Provider>,
  document.getElementById('root')
);
Create Web Page
We need a web page in order to render our root React component into.
Create a folder called public and a folder underneath it called index.html.
<!DOCTYPE html>
<html lang="en">
<head>
  <meta charset="UTF-8">
  <title>React Redux Form</title>
</head>
<body>
  <div id="root"></div>
  <script src="/static/bundle.js"></script>
</body>
</html>
Running the App
Fire up a command line console and run the following command.
npm start
Now you can open up a browser instance and go to http://localhost:3000 see your app working.

Conclusion
You can find the source code in Github here.