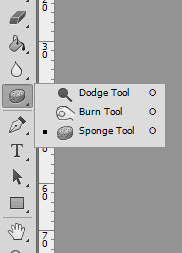
The Dodge, Burn, and Sponge tools in Photoshop CS 6 can be used to correct the lighting of an image. Let’s look at each of these tools and what they are useful for.
- Dodge Tool - Lighten an area
- Burn Tool - Darken an area
- Sponge Tool - Desaturate/saturate color
With these tools a photographer can enhance a photo by retouching the areas affected by strong light, harsh shadows and bright/weak colours.
Dodge Tool
Dodge Tool is grouped with Burn and Sponge Tools. To use the last Dodge, Burn, Sponge Tools, use the keyboard shortcut of “O”.

Once you selected this tool, an options bar will be displayed on the top of the window, showing Range and Exposure drop downs.
Range
This specifies if the Dodge tool affects shadows, mid-tones, or highlights in the areas you use the tool.
Exposure
Specifies the effect the Dodge tool makes as you drag. Always start with a lower exposure, so that you can drag it over again if the areas needs a strong effect.

Simulates Airbrush stroke.
Protect Tones
Tells Photoshop to minimize the clipping and makes sure the colours do not change. You can leave this unchecked for most scenarios.

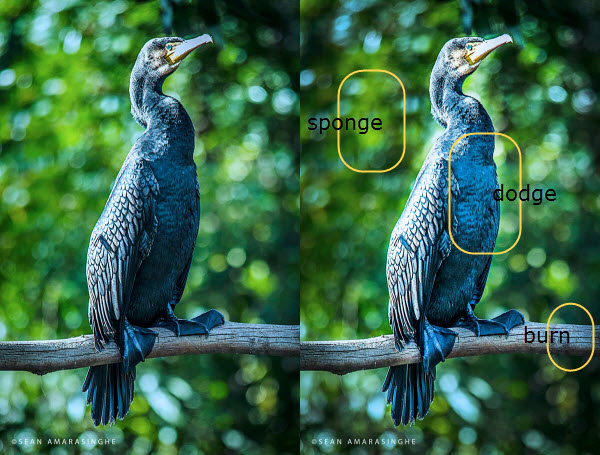
Take a look at the image below. See how the dark areas and shadows are lightened by the Dodge Tool, bright areas which do not need attention are darkened with the Burn Tool and background colours have been desaturated to focus on the subject with the Sponge Tool.

Burn Tool
Opposite of the Dodge Tool, Burn tool darken the image. Right-click the toolbox again and select the Burn Tool.
The options are exactly the same as the Dodge Tool.
Sponge Tool
The Sponge Tool allows you to desaturate or saturate the colours. Options bar for Sponge tool is a little bit different, so let’s go over each of the options.

Mode specifies whether the Sponge tool saturates (adds more color intensity) or desaturates (decreases color intensity) in the area you drag over.
Flow identifies how much of a change the Sponge tool makes as you drag.
Where to use these tools
Sponge Tool - Use the Sponge tool to desaturate to make certain areas of a picture be black and white. For example, use desaturate to take a picture of an object (example: red rose) or one coloured object and create a selection around that object. Then inverse the selection (this makes it so everything but the object can be modified). Now desaturate everything else. Your end result is a black and white picture with an object in the middle (very cool effect).
Burn Tool - Fix bright areas, and also you can make shadows appear to be even darker than they were photographed.
Dodge Tool - You could use this tool to fake sunlight on an object. Sometimes, you are merging 2 pictures together and picture 1 which ends up being the background has some sunlight in it. Picture 2 has no sunlight in it. That is a great time to pull out the Dodge tool and add some specific light to the image.
These tools will be taking a regular part in your toolbox when it comes to enhancing image.