
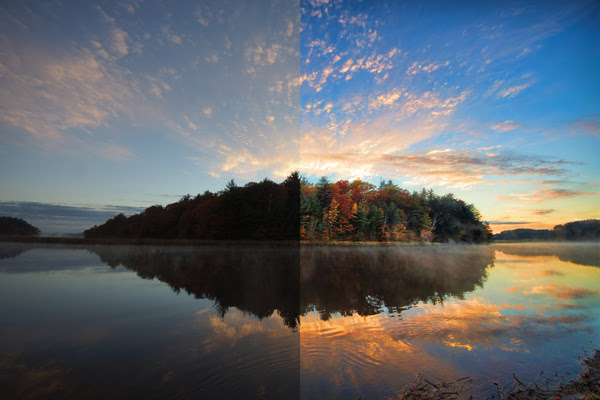
Here are the steps on how to recover shadows and make an image more vibrant with the Topaz Lab’s plug-ins.
- Open your image in a compatible host editor. For this demonstration the Topaz standalone editor photo labphotoFXlab will be used, however, our plug-ins can be accessed with a variety of other programs including Photoshop, Photoshop Creative Cloud, Photoshop Elements, Lightroom, iPhoto, Aperture, PaintShop Pro, Serif, and Irfanview.
Duplicate the layer (ctrl/cmd + J) and open Topaz Adjust.
Go to Global Adjustments and expand the Adaptive Exposure panel. Increase adaptive exposure and regions to bring out the shadows in the island.
Up close you will notice that artifacts have formed in the sky and water due to the exposure adjustments. Use the Brush Out tool under the Local Adjustments panel to mask out this effect from the sky and water. Increase the Edge Aware slider when brushing out around the island to maintain a precise edge. Use the Opacity slider to increase or decrease the strength of how much is brushed away.
Press Apply to apply the effect and then press Reset to dispose of the brush out mask so that you can apply additional effects within the Adjust program.
Go to the Classic Collection and apply the preset Brilliant Cold. If desired, reduce the transparency of the effect under the Finishing Touches panel. This will blend back in the original image with the effect.
Press OK to return to your host editor. Duplicate the layer and open Topaz Clarity.
In Clarity make these adjustments in dynamics and tone. Here’s what was used for this example…
Black 0.20 Midtones 0.16 White -0.35
Micro contrast 0.20 Low contrast 0.25 Medium contrast 0.13 High contrast -0.19
Next, make adjustments in the HSL (hue-saturation-luminance) panel. For this example, the overall saturation was boosted to 0.25 and the green luminance was increased to around 0.15.
Press OK. Back in your host editor duplicate the image and open Topaz DeNoise.
Use a preset in DeNoise that will reduce all artifacts seen in the image. This particular example used the JPEG – strongest preset. Use the upper-right preview image to navigate around the main photo. Press OK when content with the results.
When finished making all adjustments, the last step in this workflow is to prepare the image for output with detail sharpening. Duplicate the layer and open Topaz Detail.
Use the effect mask to create a mask around the island and then invert that selection.
Under the Creative Detail Collection apply the preset, Micro Contrast Enhancement II to bring out details in the island. Press OK when complete.
Save the image.